This frustrating issue can disrupt the seamless operation of your dishwasher, leaving you with dishes that aren’t as clean as they should be and even unpleasant odors emanating from the appliance. In this comprehensive guide, we’ll explore the causes behind the dishwasher clogged drain and provide detailed solutions to help you restore efficient drainage.
Identifying the Symptoms
Causes of Slow Drainage:
- Clogged Drain: One of the most common reasons for slow drainage is a clogged dishwasher drain. Over time, food particles, grease, soap residue, and debris can accumulate in the drain, restricting the flow of water. This results in water lingering in the dishwasher longer than it should.
- Obstructed Drain Hose: The drain hose is responsible for carrying wastewater out of the dishwasher and into the drainage system. If the drain hose becomes kinked, twisted, or partially blocked, it can impede the flow of water, causing slow drainage.
- Drain Pump Issues: The dishwasher has a drain pump that helps push wastewater out of the machine. If the pump is malfunctioning or clogged, it may not efficiently remove water, leading to slow drainage.
Causes of Water Pools at the Bottom
- Incomplete Drainage: The primary cause of water pooling in the dishwasher is incomplete drainage. When the dishwasher completes its wash and rinse cycles, it’s supposed to efficiently drain all the wastewater through the drain hose and into the drainage system. However, if the drain is clogged or obstructed, water remains inside the dishwasher, forming a pool at the bottom.
- Blockages in the Drain Path: Several factors can lead to blockages in the dishwasher’s drain path. Accumulated food particles, grease, soap residue, and debris can gradually build up and hinder the flow of water. Additionally, foreign objects like utensils, plastic items, or small kitchen tools accidentally falling into the dishwasher can create blockages.
- Hygiene Concerns: Apart from affecting the dishwasher’s performance, the presence of pooled water raises concerns about hygiene. Stagnant water inside the dishwasher becomes a breeding ground for bacteria and fungi, which can lead to unpleasant odors and potentially contaminate your dishes during subsequent cycles.
- Mold and Odor: Over time, if the issue of pooled water is not addressed, it can result in the growth of mold and mildew within the dishwasher. This can intensify the unpleasant odors and make the appliance less hygienic.
Causes of Unpleasant Odors
When your dishwasher begins to emit foul or musty odors, it’s time to investigate the source and take corrective measures. Here’s why unpleasant odors occur and what you need to know:
- Stagnant Water: The root cause of these odors often lies in stagnant water trapped within the dishwasher. When the drainage system is not functioning correctly due to clogs or blockages, water accumulates in the dishwasher’s interior, particularly in the bottom.
- Bacterial Growth: Stagnant water provides an ideal breeding ground for bacteria and fungi. As microorganisms multiply in this moisture-rich environment, they release gases and byproducts that contribute to the unpleasant odor. These odors can range from a mild mustiness to a more pungent, foul smell.
- Food Residue Decomposition: Food particles and organic matter left on dishes or in the dishwasher can decompose over time when exposed to moisture and heat. This decomposition process generates unpleasant odors that can permeate your dishes, making them unappetizing and unhygienic.
- Soap Residue: Excessive use of detergent or the use of low-quality detergents can lead to the buildup of soap residue in the dishwasher’s interior. This residue can harbor odors and affect the overall cleanliness of your dishes.
- Mold and Mildew: Prolonged exposure to moisture and warmth can encourage the growth of mold and mildew within the dishwasher’s hidden corners and crevices. These fungi emit musty and sometimes unpleasant odors that can become noticeable when you open the dishwasher door.
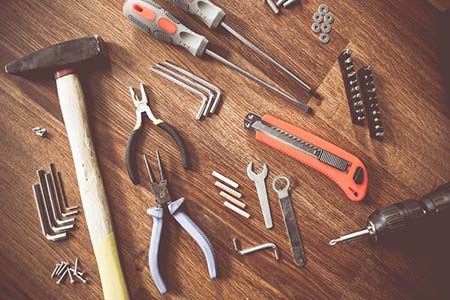
Tools You’ll Need for DIY Repairs
When it comes to tackling DIY dishwasher repairs and maintenance, having the right tools at your disposal is essential for success. Here’s a list of common tools you may need to perform various dishwasher-related tasks:
- Clearing Residue Buildup: Over time, food particles and grease can accumulate in your garbage disposal unit. To prevent this buildup, run your disposal regularly, even if it’s just for a few seconds after washing dishes. This helps flush out any debris and keeps the disposal clean.
- Use Cold Water: When running your garbage disposal, always use cold water. Cold water helps solidify grease and oils, making it easier for the disposal to break them down. Avoid using hot water, as it can cause fats to liquefy and potentially clog your pipes.
- Avoid Hard Items: Be cautious about what you put down the disposal. Hard items like bones, fruit pits, and seafood shells should be avoided, as they can damage the disposal’s blades. Fibrous materials like corn husks and celery can also cause clogs.
- Citrus Freshener: To keep your garbage disposal smelling fresh, drop a few citrus peels down the disposal and run it with cold water. The natural oils from the peels help eliminate odors.
- Ice Cube Cleanse: Periodically, you can give your garbage disposal a thorough cleanse by tossing a few ice cubes down it. This helps dislodge debris and cleans the blades. Follow up with cold water.
- Vinegar and Baking Soda: For a natural cleaning solution, pour a cup of vinegar and a half-cup of baking soda down the disposal. Let it sit for a few minutes, then run cold water and turn on the disposal. This mixture helps break down grease and eliminates odors.
- Use a Drain Screen: Placing a drain screen or stopper in your sink can help prevent food particles from entering the disposal. This reduces the chances of clogs and keeps your drainage system clear.
- Regular Maintenance: Consider scheduling regular maintenance for your garbage disposal, especially if you use it frequently. A professional can inspect it for any issues and perform necessary repairs or cleaning.
- Inspect Connections: Periodically check the connections between your dishwasher and garbage disposal. Ensure there are no leaks, loose fittings, or clogs in the dishwasher’s drain hose.
DIY Solutions
1. Cleaning the Dishwasher Filter
Your dishwasher’s filter plays a pivotal role in keeping your dishes clean and preventing drain clogs. Regularly cleaning this component is a simple yet highly effective way to maintain your dishwasher’s optimal performance. In this section, we’ll guide you through the process of cleaning the dishwasher filter:
- Access the Filter: The dishwasher filter is typically located at the bottom of the dishwasher’s interior, beneath the lower spray arm. Accessing it may require you to remove the bottom rack. Refer to your dishwasher’s user manual for specific instructions on filter access.
- Remove Debris: Once you’ve located the filter, carefully remove it from its housing. You may need to twist or lift it out, depending on your dishwasher’s design. As you remove the filter, you may notice a buildup of debris, including food particles, grease, and residue.
- Rinse Under Warm Water: Take the filter to the sink and rinse it thoroughly under warm, running water. Use a soft brush or an old toothbrush to gently scrub away any stubborn debris or residue. Pay close attention to the filter’s fine mesh or small perforations, as these can trap tiny particles.
- Inspect the Filter Housing: While the filter is removed, inspect the filter housing inside the dishwasher for any remaining debris or buildup. Use a damp cloth or sponge to clean the housing and ensure it’s free of obstructions.
- Reassemble and Test: Once the filter is clean, reassemble it by placing it back into its housing. Ensure it’s properly seated and secure. Return the bottom rack to its place. Before running a new dishwasher cycle, run your tap until the water is hot to ensure optimal cleaning performance.
2. Unclogging the Drain Basket
A clogged dishwasher drain basket can disrupt your dishwasher’s drainage and result in standing water at the bottom of the appliance. Fortunately, unclogging the drain basket is a relatively quick and straightforward fix. Follow these steps to get your dishwasher back in working order:
- Locate the Drain Basket: The drain basket is typically found at the bottom of the dishwasher, near the back. It’s designed to catch larger food particles and prevent them from entering the dishwasher’s drainage system.
- Remove the Bottom Rack: To access the drain basket, you’ll need to remove the bottom rack of your dishwasher. Carefully slide the rack out and set it aside.
- Inspect the Drain Basket: Examine the drain basket closely. You may find it filled with debris such as food scraps, paper, or small objects. These can obstruct water flow and lead to drainage issues.
- Remove Debris: Using your hands or a pair of kitchen gloves, remove the debris from the drain basket. Dispose of the collected material in your trash or compost bin.
- Rinse the Drain Basket: After removing the debris, rinse the drain basket thoroughly under warm, running water. This will help ensure it’s clean and free of any remaining residue.
- Check for Additional Blockages: While the drain basket is removed, take a moment to inspect the area around it. Sometimes, debris can accumulate in the surrounding area, contributing to clogs. Use a cloth or a sponge to clean any debris you find.
- Reassemble and Test: Once the drain basket and surrounding area are clean, carefully place the drain basket back into its original position. Make sure it’s secure and properly seated. Slide the bottom rack back into the dishwasher.
- Run a Test Cycle: With the drain basket unclogged and reassembled, run a test dishwasher cycle with no dishes inside. This will allow you to check if the drainage issue has been resolved. Ensure the dishwasher is draining properly and that no standing water remains at the end of the cycle.
3. Running a Vinegar Wash
A vinegar wash is a natural and effective method to clean your dishwasher’s drain and prevent clogs. Vinegar’s acidity helps dissolve mineral deposits, soap residue, and food particles that can accumulate in the drain over time. Here’s how to run a vinegar wash for optimal drain cleaning:
- Empty the Dishwasher: Ensure your dishwasher is empty of dishes, utensils, and any other items. It’s important to run the vinegar wash with a clean dishwasher.
- Remove Debris: Check and clean the dishwasher’s filter and drain basket if necessary. This will help improve the effectiveness of the vinegar wash.
- Prepare the Vinegar Solution: Pour distilled white vinegar into a dishwasher-safe container or a dishwasher-safe bowl. A common recommendation is to use 2 cups (500ml) of white vinegar, but you can adjust the amount depending on the severity of the clogs and your dishwasher’s size.
- Place the Container: Position the container with the vinegar on the bottom rack of the dishwasher, ensuring it won’t interfere with the spray arm’s rotation. You can also place the container on the top rack if it fits better there.
- Run a Hot Cycle: Set your dishwasher to its hottest water cycle. Heat enhances the effectiveness of the vinegar. Start the dishwasher and let it run through the entire cycle, including the wash and rinse phases.
4. Checking and Reconnecting the Drain Hose: Ensuring Proper Flow
A properly connected and functioning drain hose is essential for your dishwasher to efficiently remove wastewater. If you suspect that the drain hose may be damaged or disconnected, follow these steps to check and, if necessary, reconnect it:
- Access the Back of the Dishwasher: Depending on your dishwasher’s design, you may need to pull it out from its installed position to access the back. Be prepared for this step and ensure there’s enough space to work comfortably.
- Locate the Drain Hose: The drain hose is typically a flexible, plastic or rubber tube connected to the dishwasher’s drainage pump. It runs from the dishwasher’s bottom, through the cabinet, and connects to the plumbing system under the sink.
- Inspect the Drain Hose: Carefully examine the entire length of the drain hose for any visible damage, such as cracks, holes, or kinks. These issues can disrupt the proper flow of water and lead to drainage problems.
- Check the Connections: Verify that the hose connections at both ends are secure. At the dishwasher end, the hose should be connected to the drainage pump outlet. At the sink end, the hose should be connected to the air gap, garbage disposal, or drain pipe. Ensure that hose clamps or fasteners are tightened properly.
- Reconnect If Necessary: If you find any issues with the drain hose, such as disconnection or damage, you’ll need to address them. Reconnect the hose securely to both the dishwasher and the drain point.
- Test for Leaks: After reconnecting the hose, run a short dishwasher cycle with no dishes inside and check for leaks. Leaks can occur if the hose connections are not tight or if the hose itself is damaged.
- Observe Drainage: During the test cycle, pay attention to the drainage process. Ensure that water is flowing through the hose smoothly and that there are no signs of blockages or slow drainage.
- Reassemble and Secure: If everything is functioning correctly, carefully slide the dishwasher back into its original position. Ensure that the drain hose is not kinked or pinched when doing so.
- Run a Full Cycle: To confirm that the drainage issue has been resolved, run a full dishwasher cycle with dishes inside. At the end of the cycle, check if the dishwasher has drained properly, leaving no standing water.
5. Maintaining the Garbage Disposal
- Clearing Residue Buildup: Over time, food particles and grease can accumulate in your garbage disposal unit. To prevent this buildup, run your disposal regularly, even if it’s just for a few seconds after washing dishes. This helps flush out any debris and keeps the disposal clean.
- Use Cold Water: When running your garbage disposal, always use cold water. Cold water helps solidify grease and oils, making it easier for the disposal to break them down. Avoid using hot water, as it can cause fats to liquefy and potentially clog your pipes.
- Avoid Hard Items: Be cautious about what you put down the disposal. Hard items like bones, fruit pits, and seafood shells should be avoided, as they can damage the disposal’s blades. Fibrous materials like corn husks and celery can also cause clogs.
- Citrus Freshener: To keep your garbage disposal smelling fresh, drop a few citrus peels down the disposal and run it with cold water. The natural oils from the peels help eliminate odors.
- ice Cube Cleanse: Periodically, you can give your garbage disposal a thorough cleanse by tossing a few ice cubes down it. This helps dislodge debris and cleans the blades. Follow up with cold water.
- Vinegar and Baking Soda: For a natural cleaning solution, pour a cup of vinegar and a half-cup of baking soda down the disposal. Let it sit for a few minutes, then run cold water and turn on the disposal. This mixture helps break down grease and eliminates odors.
- Use a Drain Screen: Placing a drain screen or stopper in your sink can help prevent food particles from entering the disposal. This reduces the chances of clogs and keeps your drainage system clear.
- Inspect Connections: Periodically check the connections between your dishwasher and garbage disposal. Ensure there are no leaks, loose fittings, or clogs in the dishwasher’s drain hose.