If your dryer isn’t producing heat, it’s time to roll up your sleeves and get to the bottom of the issue. In this guide, we’ll explore the common causes of a dryer not heating and provide step-by-step solutions to help you restore warmth to your laundry room.
Safety First: Unplug Your Dryer
Safety is paramount when dealing with appliances. To start the diagnosis process safely, follow this step:
- Unplug Your Dryer: Begin by unplugging your dryer from the electrical outlet or turning off the gas supply if it’s a gas dryer. This ensures that there is no electrical or gas connection while you work on it, minimizing the risk of accidents.
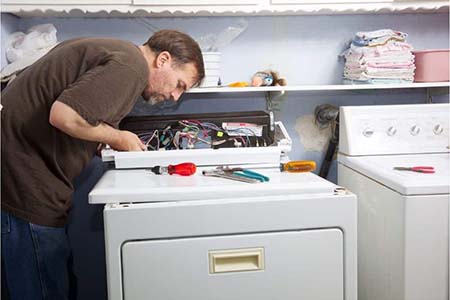
Accessing Internal Components
Accessing the internal components of your dryer is a crucial step in diagnosing the heating problem:
- Refer to Your Dryer’s Manual: Consult your dryer’s manual for specific instructions on accessing the internal components. Different dryer models may have varying access methods, so it’s essential to follow the manufacturer’s guidelines to avoid damaging your appliance.
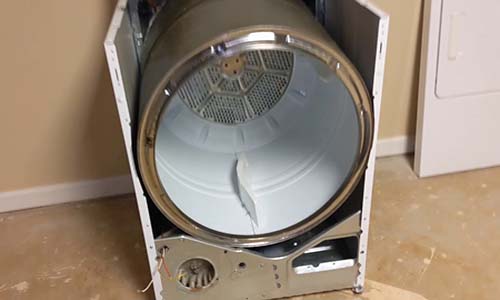
Checking the Heating Element
The heating element is a vital component of your dryer’s heating system. Here’s how to inspect it:
- Look for Visible Damage: Examine the heating element for any visible signs of damage, such as broken coils or disconnections. If you notice any issues with the heating element, it could be the root cause of your heating problem.
Inspecting the Thermal Fuse
The thermal fuse is a safety device that can interrupt the heating process if it’s blown. Here’s how to inspect and potentially replace it:
- Locate the Thermal Fuse: Find the thermal fuse, which is often located near the heating element or the blower housing.
- Check for Continuity: Use a multimeter to check the continuity of the thermal fuse. If it has no continuity, it’s likely blown and needs replacement.
Testing the High-Limit Thermostat
The high-limit thermostat is another safety device that can malfunction and disrupt heating. Here’s how to test it:
- Locate the High-Limit Thermostat: Find the high-limit thermostat, usually positioned near the heating element.
- Multimeter Test: Use a multimeter to check the thermostat’s continuity. If it fails this test, it’s likely faulty and should be replaced to restore proper heating.
Evaluating the Cycling Thermostat
The cycling thermostat helps regulate the temperature inside the dryer. To ensure it’s functioning correctly, follow these steps:
- Locate the Cycling Thermostat: Identify the cycling thermostat’s location, typically close to the heating element.
- Multimeter Continuity Test: Use a multimeter to test the cycling thermostat’s continuity. If it fails the test, consider replacing it to maintain accurate temperature control.
Examining the Igniter (for Gas Dryers)
If you have a gas dryer, the igniter plays a crucial role in starting the heating process. Here’s how to examine it:
- Locate the Igniter: Find the igniter, usually located near the gas valve assembly.
- Operational Check: While the dryer is in operation, observe the igniter. It should glow brightly. If it doesn’t, it may need replacement to ignite the gas and generate heat.
Troubleshooting Gas Valve Solenoids (for Gas Dryers)
Gas dryers rely on solenoids to control the gas valve. Here’s how to troubleshoot them:
- Locate the Gas Valve Solenoids: Identify the gas valve solenoids, usually positioned near the gas valve assembly.
- Multimeter Continuity Test: Use a multimeter to check the continuity of the gas valve solenoids. If they fail the test, replacing them can restore proper gas flow and heating.
By carefully following these steps, you can systematically diagnose the heating problem in your dryer, whether it’s electric or gas-powered. Identifying the root cause is the first step toward resolving the issue and enjoying the warmth of a fully functional dryer once again.
Solutions and Repairs
Replace a Faulty Heating Element
If your diagnosis has pinpointed a faulty heating element as the cause of your dryer’s heating issue, follow these steps to replace it:
- Purchase a Replacement Heating Element: First, acquire a replacement heating element that is compatible with your dryer’s make and model.
- Unplug the Dryer: Ensure your dryer is unplugged from the electrical outlet or that the gas supply is turned off for gas dryers.
- Access the Heating Element: Refer to your dryer’s manual to access the heating element, which is typically located inside the dryer’s cabinet.
- Remove the Old Heating Element: Carefully disconnect and remove the old heating element, taking note of its positioning and wiring connections.
- Install the New Heating Element: Install the new heating element in the same position as the old one, reconnecting the wires as they were.
- Secure All Components: Make sure all components are securely fastened and reassemble any access panels that were removed.
- Plug In and Test: Plug the dryer back into the electrical outlet or turn on the gas supply for gas dryers. Run a test cycle to ensure the heating element is functioning correctly.
Replace a Blown Thermal Fuse
A blown thermal fuse can interrupt the heating process and is a crucial safety component. Here’s how to replace it:
- Purchase a Replacement Thermal Fuse: Obtain a replacement thermal fuse with the same rating as the original one.
- Unplug the Dryer: Ensure the dryer is unplugged from the electrical outlet or that the gas supply is turned off for gas dryers.
- Access the Thermal Fuse: Locate the thermal fuse, typically near the heating element or blower housing.
- Remove and Replace: Carefully remove the blown thermal fuse and replace it with the new one.
- Secure All Components: Ensure all components are securely fastened and reassemble any access panels that were removed.
- Plug In and Test: Plug the dryer back in or turn on the gas supply for gas dryers. Test the dryer to confirm that it now heats properly.
Replace a Malfunctioning High-Limit Thermostat
A malfunctioning high-limit thermostat can disrupt the heating process. Here’s how to replace it:
- Obtain a Replacement Thermostat: Purchase a replacement high-limit thermostat compatible with your dryer.
- Unplug the Dryer: Ensure the dryer is unplugged from the electrical outlet or turn off the gas supply for gas dryers.
- Access the Thermostat: Locate the high-limit thermostat, often near the heating element.
- Remove and Replace: Carefully remove the malfunctioning thermostat and replace it with the new one.
- Secure All Components: Ensure all components are securely fastened and reassemble any access panels that were removed.
- Plug In and Test: Plug the dryer back in or turn on the gas supply for gas dryers. Test the dryer to confirm that it now heats properly.
Replace a Faulty Cycling Thermostat
The cycling thermostat helps regulate temperature control. To replace it:
- Acquire a Replacement Thermostat: Obtain a replacement cycling thermostat that matches your dryer’s specifications.
- Unplug the Dryer: Ensure the dryer is unplugged from the electrical outlet or that the gas supply is turned off for gas dryers.
- Locate the Thermostat: Find the cycling thermostat, typically positioned near the heating element.
- Remove and Replace: Carefully remove the malfunctioning thermostat and replace it with the new one.
- Secure All Components: Ensure all components are securely fastened and reassemble any access panels that were removed.
- Plug In and Test: Plug the dryer back in or turn on the gas supply for gas dryers. Test the dryer to confirm that it now maintains proper temperature control.
Replace a Defective Igniter (for Gas Dryers)
For gas dryers, a malfunctioning igniter can disrupt the heating process. To replace it:
- Purchase a Replacement Igniter: Obtain a replacement igniter designed for your gas dryer model.
- Unplug the Dryer: Ensure the dryer is unplugged from the electrical outlet or turn off the gas supply.
- Access the Igniter: Locate the igniter, often near the gas valve assembly.
- Remove and Replace: Carefully remove the defective igniter and replace it with the new one.
- Secure All Components: Ensure all components are securely fastened and reassemble any access panels that were removed.
- Plug In and Test: Turn on the gas supply for gas dryers. Test the dryer to confirm that it now ignites properly and generates heat.
Replace Faulty Gas Valve Solenoids (for Gas Dryers)
Gas valve solenoids control gas flow in gas dryers. To replace them:
- Obtain Replacement Solenoids: Purchase replacement gas valve solenoids designed for your gas dryer model.
- Unplug the Dryer and Shut Off Gas: Ensure the dryer is unplugged and turn off the gas supply.
- Locate the Solenoids: Find the gas valve solenoids, typically near the gas valve assembly.
- Remove and Replace: Carefully remove the faulty solenoids and replace them with the new ones.
- Secure All Components: Ensure all components are securely fastened and reassemble any access panels that were removed.
- Turn On Gas Supply: Turn on the gas supply for gas dryers. Test the dryer to confirm that gas now flows correctly, allowing it to generate heat.