Owning a self-cleaning oven can be a game-changer when it comes to kitchen maintenance. It’s a modern appliance designed to reduce the hassle of oven cleaning. However, understanding how to use it safely and effectively is crucial. In this comprehensive guide, we’ll delve into the world of self-cleaning ovens, covering everything from their functionality to safety precautions and maintenance tips.
Understanding Self-Cleaning Ovens
- When it comes to kitchen appliances, self-cleaning ovens are truly a remarkable innovation. They have become a popular option for numerous homeowners because of their remarkable ability to greatly simplify the process of cleaning the oven. Let’s explore further into the realm of self-cleaning ovens, comprehending what they are, how they operate, and the advantages they provide.
What Is a Self-Cleaning Oven?
- A self-cleaning oven is a kitchen appliance equipped with a specialized cleaning feature. Unlike traditional ovens, self-cleaning models come with an innovative mechanism designed to burn off food residue, grease, and other stains from the oven’s interior. The result? A cleaner and more sanitary oven without the need for laborious manual cleaning.
How Does Self-Cleaning Work?
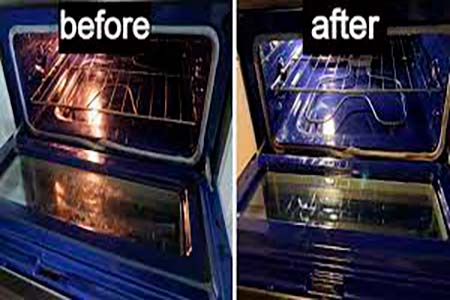
- The wonder of self-cleaning ovens lies in their remarkable capacity to achieve exceptionally high temperatures while undergoing a specific cleaning cycle. This particular cycle, which can attain temperatures of approximately 900F (480C) or even higher, transforms any food debris or spills inside the oven into ash. As the cycle advances, the remaining remnants are obliterated, resulting in a layer of ash that can be effortlessly wiped away once the cleaning procedure is finished.
Benefits of Self-Cleaning Ovens
Self-cleaning ovens offer several noteworthy advantages that make them a popular choice among homeowners:
- Time-Saving: The self-cleaning capability removes the necessity of manual scrubbing and scraping, resulting in substantial time and energy savings. Additionally, there is a reduction in the use of chemicals.
- Reduced Chemical Usage: Traditional oven cleaning often necessitates the usage of potent chemical cleansers, which may result in the presence of residual substances and noxious gases. Self-cleaning ovens diminish the need for this.
- Hygiene: The high temperatures reached during the self-cleaning cycle effectively kill bacteria and germs, ensuring a more hygienic oven interior.
- Convenience: Operating a self-cleaning cycle is as easy as choosing the suitable option and allowing the oven to take care of the task. This convenience is attractive to individuals and families who have a busy lifestyle.
Preparing Your Oven
Before you start the self-cleaning process for your oven, it is crucial to adequately prepare it in order to achieve optimal outcomes. To get your oven ready for its cleaning session, follow these instructions:
1. Removing Oven Contents
When getting ready to start a self-cleaning cycle on your oven, the initial step is to remove any objects or loose particles. It is important to ensure that there are no pots, pans, or leftover food items left inside the oven. By taking out these contents, you prevent them from being exposed to the high temperatures during the cleaning process.
2. Wiping Away Loose Debris
To enhance the efficiency of the self-cleaning process, it is recommended to first clear away any loose dirt or spills that are visible inside the oven. Utilize a dry cloth or paper towel to eliminate any crumbs, food particles, or spills found on the interior surfaces of the oven. This preliminary cleaning is essential to allow the self-cleaning cycle to primarily target tougher residues.
3. Removing Oven Racks
For optimum results during the self-cleaning procedure, it is recommended to take out the oven racks. Although it may be tempting to leave them inside, doing so can result in discoloration and make it harder to slide the racks in and out later on. To remove the racks, simply slide them out and put them aside. They can be cleaned separately using traditional methods, but avoid placing them inside the oven while self-cleaning.
Starting the Self-Cleaning Cycle
After you have adequately prepped your oven, it is now time to commence the self-cleaning cycle. The precise procedure for this varies depending on the model of your oven, thus it is imperative to refer to the user manual for specific guidelines. Nonetheless, here are the general stages involved:
Setting the Cleaning Cycle
- Refer to Your User Manual: Begin by consulting your oven’s user manual. Different oven models may have slightly different procedures for initiating the self-cleaning cycle, so it’s essential to follow the manufacturer’s guidelines.
- Lock the Oven Door: In most cases, it is imperative to fasten the oven door before starting the self-cleaning procedure. This locking mechanism guarantees that the door stays unreachable while the oven reaches extremely high temperatures.
- Select the Cleaning Duration: Depending on the type of oven you have, you may have the ability to select from various cleaning durations. The cleaning duration usually falls within the range of two to four hours. To determine the appropriate cleaning time based on the level of cleaning needed, consult your user manual.
Duration of the Cleaning Cycle
- During the self-cleaning process, your oven will be heated to exceptionally high temperatures, often reaching approximately 900F or 480C. This significant heat is essential for burning away any food remnants and spills that may be present inside the oven. The length of the cleaning cycle typically extends over several hours to guarantee a comprehensive clean.
Locking Mechanisms
After you have started the self-cleaning cycle and secured the oven door, it is essential to comprehend that the door will stay locked during the entire cleaning process. This safety measure is implemented to prevent anyone from unintentionally opening the oven while it is functioning at extremely high temperatures.
Never attempt to open the oven door during the cleaning cycle. Wait patiently until the cycle is complete, and the oven has had sufficient time to cool down. Your oven’s control panel or display will indicate when it’s safe to open the door.
By adhering to the steps outlined and following the instructions provided in your oven’s user manual, you will be able to initiate the self-cleaning cycle with confidence and achieve a thoroughly clean oven without the need for manual scrubbing.
After the Cleaning Cycle
Once the self-cleaning cycle has done its job, your oven requires some post-cleaning care. Here are the essential steps to follow:
1. Cooling Period
During the self-cleaning process, the oven can become extremely hot due to the high level of heat applied. To prevent burns or injuries, it is crucial to ensure that the oven is allowed to cool down adequately. Keep it untouched until you’re sure it’s safe to handle. This cooling period typically lasts a few hours, but consult your oven’s manual for precise guidance.
2. Removing Ash Residue
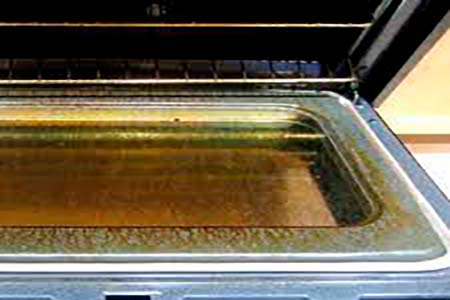
After the cooling period, you’ll notice a layer of ash residue inside the oven. This residue consists of the remnants of food particles and spills that were incinerated during the cleaning cycle. Fortunately, removing it is a straightforward process.
To tackle the ash residue, you’ll need:
- A damp cloth or sponge
- Water
Here’s what to do:
- Immerse the fabric or sponge in water and squeeze it to remove excess moisture, ensuring it is moist but not excessively soaked.
- Wipe the interior surfaces of the oven with care, making sure to include the walls, floor, and ceiling, in order to eliminate any leftover ash. The ash residue should be effortlessly removed, resulting in a clean and residue-free oven.
3. Cleaning the Oven Door
The oven door can also accumulate residue during the self-cleaning process. To ensure it remains clean both inside and out, follow these steps:
You’ll need:
- A mixture of water and mild detergent
- A soft cloth or sponge
Here’s the process:
- Prepare a blend of water and gentle detergent, making sure it is not excessively soapy; a mild mixture will yield the optimal results.
- Immerse the fabric or sponge into the sudsy water and squeeze it to remove excess liquid.
- Cleanse the outer and inner surfaces of the oven door, encompassing the glass and any stainless steel or metallic elements. Give additional consideration to any visible remnants, and delicately scrub if required.
- Thoroughly rinse the cloth or sponge to eliminate any lingering soap residue.
- Wet the fabric or sponge with fresh water and proceed to cleanse the door once more in order to eliminate any lingering detergent.
- Wipe away any excess moisture from the door’s surfaces using a dry, clean cloth, ensuring that it is left clean and free from streaks.
4. Cleaning the Oven Racks
Cleaning the oven racks is the final step in ensuring your self-cleaning oven is spotless inside and out. Here’s how to do it:
You’ll need:
- Warm, soapy water
- A scrubbing pad or brush
- Towels or a drying rack
Follow these steps:
- Take out the oven racks from the oven. They should smoothly come out now after going through the self-cleaning process.
- Put the racks in a bathtub or a big container where they can be completely immersed.
- Fill the bathtub or vessel with warm water and include a substantial quantity of dish detergent. Ensure that the racks are completely submerged.
- Allow the racks to immerse for a few hours or until the next morning. This process of immersion will aid in the removal and softening of any remaining debris.
- After the soaking process, employ a scrubbing pad or brush to eliminate any lingering residue or charred food particles. Dedicate additional focus to any tenacious areas.
- Thoroughly rinse the racks with clean water in order to eliminate all soap and debris.
- Сompletely dry the racks by either using towels or by placing them on a drying rack.
- Once the racks are dry, reinsert them into your clean, sparkling oven.
Maintaining Your Self-Cleaning Oven
Keeping your self-cleaning oven in top condition extends beyond the post-cleaning care steps. Regular maintenance can help ensure its longevity and optimal performance. Here are some essential maintenance tips to follow:
1. Regular Wipe Downs
While the self-cleaning feature is a powerful tool, it’s beneficial to perform periodic wipe downs of your oven’s interior. This maintenance step can help keep your oven in pristine condition between self-cleaning cycles.
- Use a damp cloth or sponge to wipe away any minor spills, splatters, or residue that may accumulate during regular use.
- Pay attention to the oven walls, ceiling, and floor. These are areas where food particles or spills can accumulate over time.
- By addressing small messes as they occur, you can prevent the need for a full self-cleaning cycle and maintain a cleaner oven interior.
2. Addressing Spills Promptly
One important aspect of keeping an oven clean is dealing with spills and drips as soon as possible. Even if your oven is equipped with a self-cleaning feature, allowing spills to remain can result in stubborn stains that might necessitate more extensive cleaning in the future.
- When you see any spill or drip inside the oven, promptly clean it up. Before it becomes hard or gets baked onto the oven’s interior surfaces, use a moist cloth or sponge to remove the residue.
- Adopting this uncomplicated routine has the potential to rescue both time and energy in the future, while simultaneously ensuring that your oven retains its pristine appearance.
3. Avoiding Harsh Chemicals
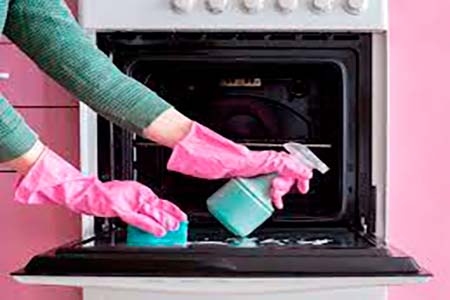
When you clean your oven by hand during the intervals between self-cleaning cycles, it is extremely important to steer clear of using harsh chemicals. Although it may be tempting to utilize powerful oven cleaners, these particular products have the potential to cause harm to the inside of the oven and can also impact its self-cleaning capability.
- Opt for gentle cleaning solutions that are safe for your oven’s interior surfaces. A mixture of water and mild detergent is often sufficient for routine cleaning.
- Avoid abrasive scrubbers or scouring pads that can scratch or damage the oven’s enamel or coatings.
- Always refer to your oven’s user manual for specific cleaning recommendations and restrictions.
4. Maintaining the Oven Seal
The door seal of the oven has a significant role to play in its ability to clean itself. It is imperative to ensure that the seal remains intact and fully functional in order for the oven to perform optimally.
- Regularly inspect the oven door seal for signs of wear, damage, or deterioration. If you notice any issues, such as gaps or visible damage, consider having the seal replaced.
- A properly functioning door seal helps contain the high temperatures generated during the self-cleaning cycle and prevents heat from escaping, allowing the cycle to work effectively.